Gummies are a staple of the cannabis edible world, and CBD gummies with tincture are no exception. Whether you’re at a dispensary, likely equipped with an area of varying THC:CBD ratios, or ordering online, the market is saturated with options. However, making your own gummies is a great way to start cooking with cannabis.
There are also a number of ways you can go about making your own THC- or CBD-enriched treats. Check out our recipe on creating CBD gummies with infused oil
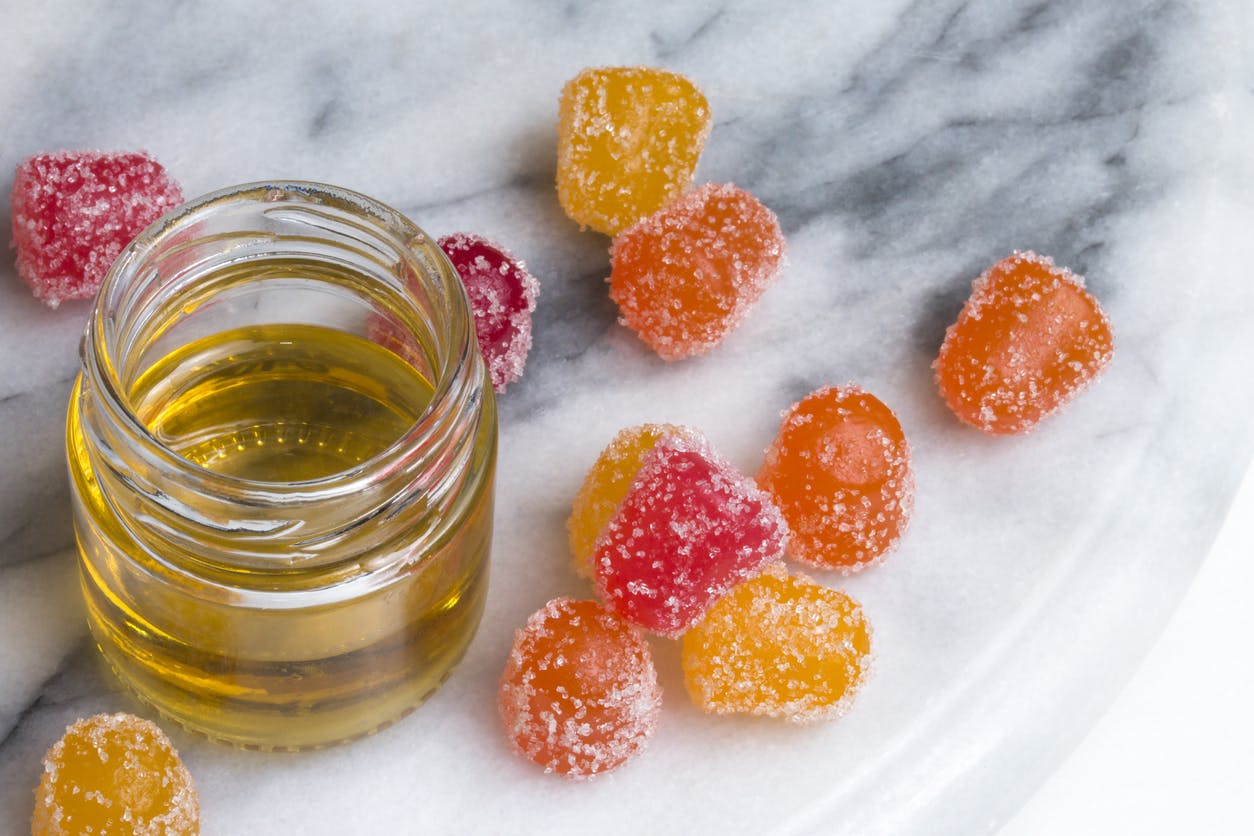
.This time around, we’re exploring another option: making CBD gummies with tincture. Tinctures are not only a great, potent and fast-acting option to have on hand as is, but it’s also super easy to use when baking to add a bit of a kick to your culinary crafts.
So if you want to learn more about cannabis tinctures and how to use them to make your own infused gummies, keep reading!
What is a Tincture?
are a handy, fast-acting method to consume cannabis, and they are not solely limited to the cannabis world, either. Tinctures as a whole have been around for millenia and play a key role in traditional herbal medicine. They are concentrated herbal extracts, generally made by soaking specific herbs, or activated cannabis, in alcohol, vinegar or vegetable glycerin.The liquid agent works to pull the active ingredients from the plant parts and concentrate those elements into liquid form.
Tinctures are a great option for cannabis consumers due to the quick turnaround time between taking the product and experiencing the effects. If you’re looking for quick relief, tinctures are metabolized in the same way cannabis drinks are — through the mouth. Ingestible edibles are usually metabolized in the liver, meaning that it might take anywhere between
for the full effects to hit.Beverages and sublingual products like tinctures, which generally sit in the mouth and under the tongue until fully absorbed, start kicking in as soon as they hit your mouth, absorbing into your bloodstream through the mouth, esophagus and stomach tissues.
Most dispensaries carry tinctures, along with a variety of cannabinoid combinations, and you’ll be hard pressed to avoid straight-CBD tinctures from CBD companies online. Though, another great benefit of tinctures is that they are fairly simple to make yourself.
How to Make an Infused Tincture
A word of caution ahead of time: If you’re hoping to whip up the tincture and a batch of gummies in a single afternoon, you might be disappointed to find out that tinctures need some time to sit and fully absorb all those valuable cannabinoids before it will be ready to use. We’re talking at least a couple weeks.
But if you’re prepared to take the plunge, you’ll need the following items:
- 1 ounce of cannabis
- 1-quart jar
- Everclear or vegetable glycerine (for those who don’t drink)
- Slow cooker, or baking tray and parchment paper
(For later)
- Strainer
- Cheesecloth
- Dropper bottles
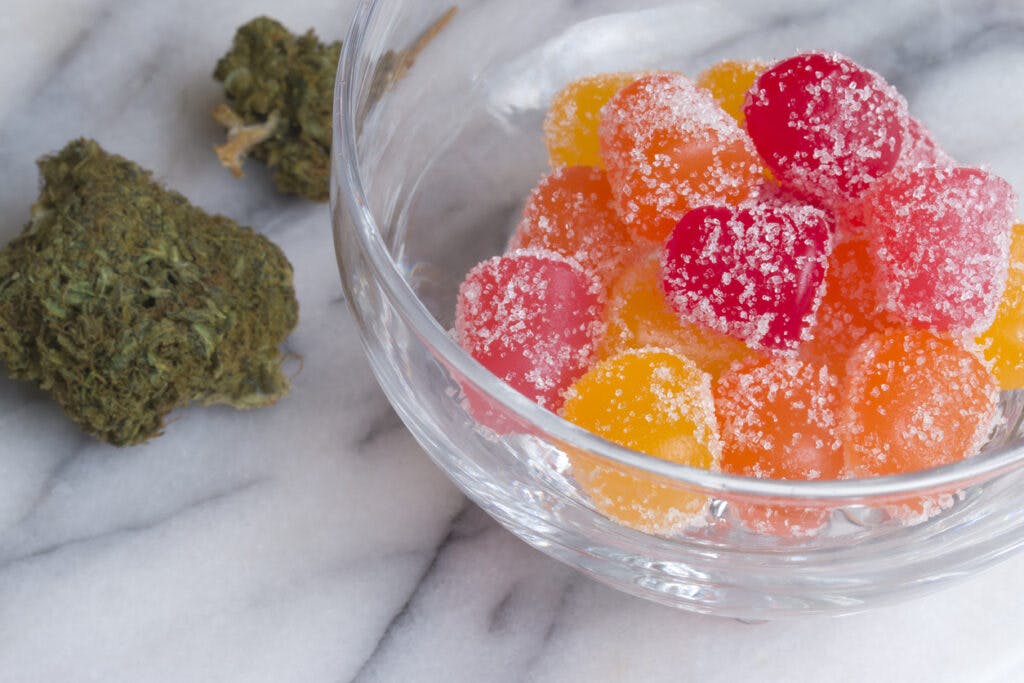
As with all of our recipes, it’s up to you what type of flower you use and experience you prefer. If you’re into THC, use that high-THC flower! You’re sure to create a tincture that will have you stoned on Cloud Nine soon enough. For folks looking for a non-psychoactive experience, we recommend going with a high-CBD flower or hemp.
Alternatively, folks using flower with small percentages of THC (maybe a few percent, but more than the 0.3 percent maximum that qualifies it as explicitly hemp) and larger percentages of CBD might enjoy the benefits of a heftier CBD:THC ratio. Many cite that just a little THC can help bring out the effects of the CBD, even if it’s not enough to get the user “high” in the same way a standard, single dose might.
The biggest difference between CBD and THC is that, while each have their potential benefits, CBD is non-psychoactive, and THC is psychoactive. Meaning, CBD won’t result in a “high” that’s often associated with cannabis, but THC sure will. For more on the distinction,
.Instructions:
Step 1: Decarb Your Flower
Before we do anything, we need to
. This is a process of heating the cannabis to convert the unactivated cannabinoids in the flower to active compounds that can affect our bodies upon ingestion. Essentially, the heat of a flame activates flower if we smoke it, but we wouldn’t feel the effects if we just straight-up ate a piece of bud. It’s a crucial part of the at-home edible-making process.- To start, . It should be fluffy, not powdery (meaning, don’t over-grind). You want to make sure that the flower won’t slip through a strainer. Spice grinders will work well, though hand-held weed grinders will also get the job done.
- Place the ground flower into a glass jar* with a lid you can firmly attach.
- With your ground flower in the jar, place a trivet in the bottom of your slow cooker with the jar on top.
- Fill the cooker with enough water to cover about half of the jar.
- Pop on a lid, and set the cooker for a pressure cook on high for 40 minutes.
*Alternatively, you can decarb your flower in the oven. Preheat to 225°F, line a baking tray with parchment paper and evenly spread the ground flower on the tray. Cook the ground flower in the oven for 50 minutes.
Whichever method you choose, you’ll see the flower’s color darken, which is a solid sign that you have activated cannabis!
Step 2: Get the Tincture Started
Take your activated, ground flower and fill your jar with it. Add in your liquid, but leave a bit of room at the top of the jar (at least an inch). Place a lid firmly top, and store in a dark, cool area.
Step 3: The Waiting Game
Don’t say we didn’t warn you! You’ll want to leave your tincture to settle for at least two weeks, after which time we recommend testing it. If it suits your fancy, feel free to strain the plant matter with a strainer and cheese cloth (make sure to squeeze out your cheesecloth at the end to get all those precious juices!) and store your concoction in dropped bottles.
Patience may pay off in the long run, though. If you have the time and willpower, tinctures can truly pack a huge punch when left to concentrate for weeks, or even a few months.
Step 4: Enjoy Your Tincture!
Tinctures can be taken on their own under the tongue, they can be added to foods and beverages and, of course, they can be used for baking.
Generally, a single dropper is considered a single dose, so that might be a good best practice as you test. Though, for more potent tinctures, some may settle on a half dropper as a single dose. And while creating a super-strong infused product is clearly a benefit, be conscious and responsible, especially if you’re working with high-THC flower. Luckily, as tinctures hit pretty quickly, you should have a pretty good idea of the effects within 30 minutes or so of taking it.
If you were simply looking to make your own tincture, congrats! That’s all there is to it. If you want to go a step further, continue the journey as we use our newly concocted tinctures to create some stellar, infused gummies!
How To Make CBD Gummies with Tincture
- Prep time: 20 minutes
- Chill time: 2 hours
- Total time: 2 hours 20 minutes
- Yield/servings: 24 large gummies, or 48 medium gummies (this depends on your mold)
It’s time to get going on your gummies! Be sure you have the following supplies and ingredients before getting started.
Supplies
- Gummy mold
- Liquid droppers
- Saucepan
Ingredients
- 1 cup water/6 tea bags (hibiscus or fruity teas preferred) or 1 cup of fruit juice
- 3 tablespoons of dried fruit powder(s) of your choice
- 1-½ tablespoons fresh lemon or lime juice
- 4 tablespoons unflavored gelatin, or vegan gelatin
- 24 doses of tincture, no more than 5 teaspoons*
- Honey or agave nectar (optional)
*Note, you can make your gummies as potent as you want them to be. A single dropper is generally 1ml, and 24ml is roughly 4.86 teaspoons. While you might have a little wiggle room if you want to add more tincture, you might have to pare down slightly on your tea/juice or lemon and lime juice so the mixture is the proper consistency.
Also, it’s never a bad idea to give these recipes a shot before using your tincture if you’re new to it. You spent all that time on it — you want to make sure it’s going to go to good use!
Step 1: Make Your Tea/Heat Fruit Juice
If you’ve opted for tea, bring your cup of water to a boil and pour it over your teabags in a heatproof cup or bowl. Let it steep for five minutes, and measure out three-quarters cup of tea. Discard any remaining liquid. For juice, add a full cup in a saucepan and keep it at a light simmer.
Add your tincture before continuing to the next step.
Step 2: Add the Gummy Base
Place your three-quarters cup of tea in a small saucepan, or use the same saucepan if you are simmering fruit juice. Add the dried fruit powder, sugar and lemon juice. Begin stirring with a whisk until the mixture is well-combined, and keep it at a simmer over medium-low heat. It should be hot, not boiling.
Slowly add your gelatin mixture to the pot, and whisk continuously to ensure the gelatin dissolves. Continue cooking your concoction over medium-low heat until the gelatin is completely melted and the mixture is smooth.
Step 3: Pour into the Molds
Place your gummy mold on a rimmed baking sheet, grab your handy dropper or pipette, and fill the gummy mold with your mixture.
Note that the liquid will start solidifying once it’s removed from heat, so work swiftly! Any large bubbles can be removed with a quick poke of a toothpick or by tapping the mold against your surface area.
Step 4: Refrigerate the Gummies
Unfortunately, your gummies aren’t quite ready to eat yet: They must set in the refrigerator. Once the mold is completely filled, chill your gummies until they are firm for approximately two to four hours.
Once ready, try out a gummy and wait at least an hour. This will be a great indicator for the future about the approximate dosing and effects for a single gummy.
Step 5: Store Your Gummies
Congrats! Your homemade CBD gummies with tincture have chilled, and they are ready to eat! Your final task is to pop each gummy out of the mold and ensure they are stored properly.
An airtight container in the refrigerator is ideal. If gummies are exposed to air, they can become dense and chewy, eventually drying out over time. To maintain the best texture, make sure they are stored in the fridge within 24 hours. For maximum effect and taste, enjoy within two weeks of baking.
Finally, give yourself a pat on the back. You just learned how to make CBD gummies with tincture!
Wrapping Up
The best part about familiarizing yourself with the world of DIY cannabis edibles is embracing just how versatile the plant can be. There are so many different methods of consuming cannabis, and it’s often easier than one might think to create the products lining dispensary shelves in our own kitchens.
Not only does it save money in the long run, but
allows us to take better control of the cannabinoids we’re ingesting and what will aid in our specific wellness needs.So, go forth, relish in your newly found culinary skills and enjoy the fruits of your labor! If you enjoyed this article, spread the good word by sharing it with friends, so they can also craft CBD gummies with tincture.