
The different steps involved in
can seem daunting. That’s why in my “From Roots to Harvest” series, I’m going to break down how to grow cannabis, step-by-step. I’ve already shared how to , and last month we chatted through how to . Now it’s the next part of my series, where we’re moving on to the vegetative state, and I’ll teach you how to transplant weed plants. After all, you’ve put in so much work so far, taking a misstep at this point could be devastating.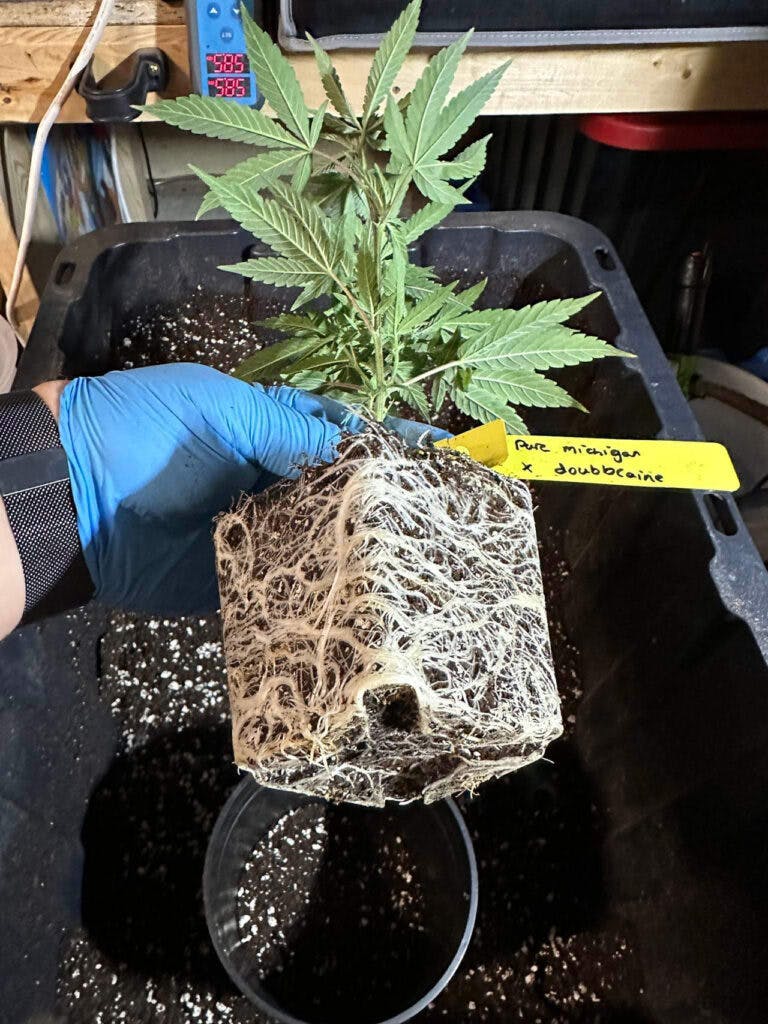
Transplanting Weed Seedlings
Cannabis plants can be transplanted multiples times in their lives to ensure they have enough space to grow. That’s because you want to avoid root systems getting too restricted. Not enough space could cause the roots to become a tangled mess, also referred to as root-bound. Plants can also get plagued with root rot if not transplanted successfully. Both issues can lead to plants that are stunted, weak, or worse — dead. So put simply, transplant weed seedlings to give their roots more room to grow, and the end result will be happy, healthy plants.
The basic idea of transplanting weed seedlings is safely moving your cannabis seedlings (complete with roots and their original growing medium) to a larger pot with additional, new grow medium and nutrients.
When to Transplant Weed Plants
So now that you understand why transplanting is important, how do you know when to transplant cannabis seedlings? Growing from seed, there are a few ways to determine when to transplant cannabis seedlings from starter pots into larger ones.
Ultimately, the best time to transplant weed plants is after germination and in the beginning of the vegetative phase. There are a few ways to determine when it’s the right time to transplant cannabis seedlings, using just a couple of your senses.
Sight: One tried-and-true method is to wait until your seedlings have around four or five sets of leaves. You may also notice the white roots are becoming visible, possibly even pushing through the bottom of the pot. Finally, you may see the plant is entering the vegetative state, which means you need to act fast. Weed plants go from being a seedling to the vegetative state when it has grown fan leaves with leaflets.
Touch: The stem of the cannabis plant will become much firmer to the touch, indicating the plant’s increasing size and strength.
How to Transplant Weed Plants
Your patience has paid off, and you’re ready to get these seedlings out of their starting pots. I personally prefer to let my plants dry out a little before transplanting into larger pots. I find the medium stays together better letting the roots hold it all together. It is at this point I would generally advise a healthy dose of mycorrhiza directly rubbed onto the root ball to help the plants flourish in their new environment. Be sure to wear gloves and keep the area clean when dealing with the plant roots during the transplanting process.
Once your plants are in their new pots I give a top dress of Green Rush Leafy Green Grow combined with a rather heavy watering. This ensures a complete soak of the growing medium, reducing the chance of dry spots within the pot. After any major move I like to give a little rest time for the plants to settle into their new homes. Normally within the first week after transplant, training the plant begins. This is where we can be sure to really take advantage of our entire grow space.
Shaping & Training Techniques
When growing your cannabis in the vegetative stage there are several different ways to shape the way your plant will grow. Some examples include topping, scrogging, monster cropping, light stress training and heavy stress training. Utilizing one or a mixture of different training techniques will really bring your grow to the next level.
While growing inside one must remember that your light source for the most part (unless using light movers) will be stationary. That being said, I find it absolutely crucial to bring the most amount of bud sites to the light as possible.
My personal go-to when setting up my plants for my tent is to let the plant grow to the fourth or fifth node, at which point I will top my cannabis plants. It’s relatively standard that after topping cannabis plants, the following steps are stress training and scrogging, albeit with time between each step. So, I will take a dive into the topping, stress training and scrogging processes as well.
Topping Cannabis Plants
Topping is achieved by simply cutting slightly above the node at which you want your plant to branch out and grow two “mains” instead of continuing to grow as a single main stem. Topping can be done several times, each time doubling the amount of mains. It is easy for one to see the benefits to topping your cannabis plants as you can achieve a much more uniformly flat canopy.
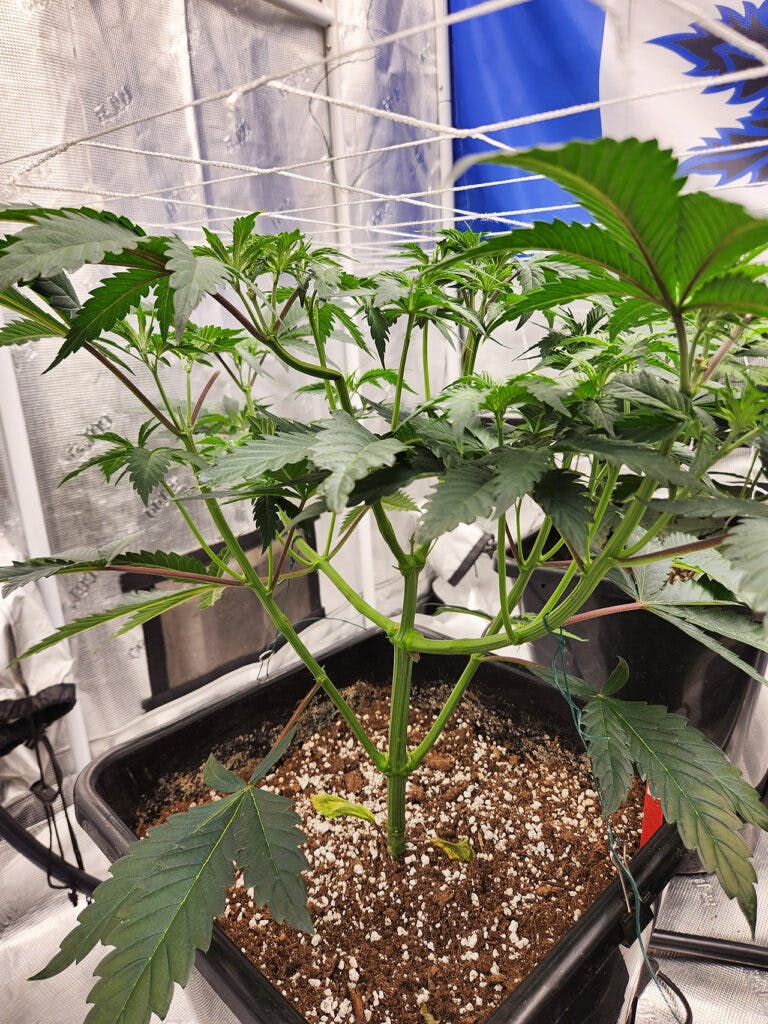
Stress Training
As stated above, I always give a little rest time between any big moves, which definitely includes topping. Once we have given it a week or so since topping, I would then start bending my new mains to the side opposed to typical vertical plant growth. Letting the plant grow out sideways opens up many new bud sites as the plant continues to grow. The idea here again is to keep a nice and even canopy, maintaining such will make life a lot easier come time to flip the flower.
Light Stress Training
Light stress training involves tying down the cannabis stems. Many growers will choose to use rope, or a twist tie material with clips to the side of their pots. This is a cheap solution to achieve beautiful bush shapes out of our plants.
Heavy Stress Training
Heavy stress training involves being a little more daring with your plants. Along with tying down your plants one will actually slightly damage the stem. There are a few very good reasons to do so. For example, when a plant starts taking off in a direction that you do not want.
If one of the cannabis plant’s main branches is inches above all the others. One can simply squeeze the stem while rolling it between your fingers to soften the membranes of the plant without actually breaking the skin. This in turn will damage the stem giving the other branches time to catch up. It also aids in tying down branches as the branch itself will not fight back against the tie for a few days.
Once your plant has had time to heal you will notice rather large “knuckles” where you bent. This will come in handy later on down the road in flower as it creates a very strong point once fully healed. The plant will actually be stronger at that point once healed than it was previously before being damaged.
Scrogging Marijuana Plants
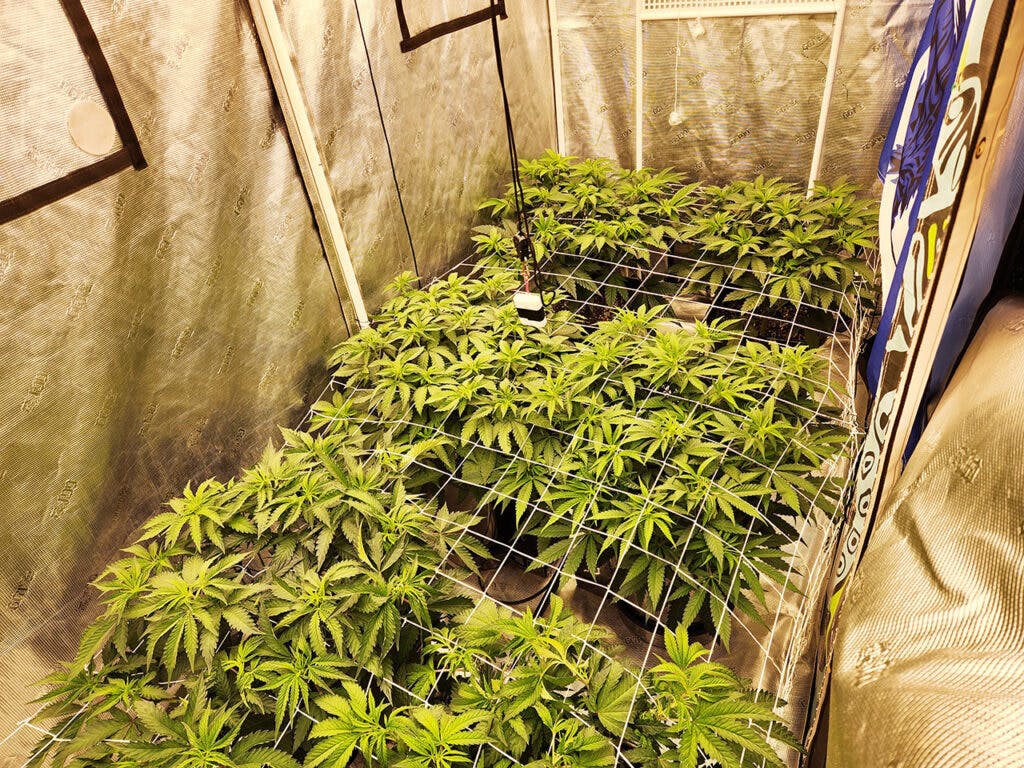
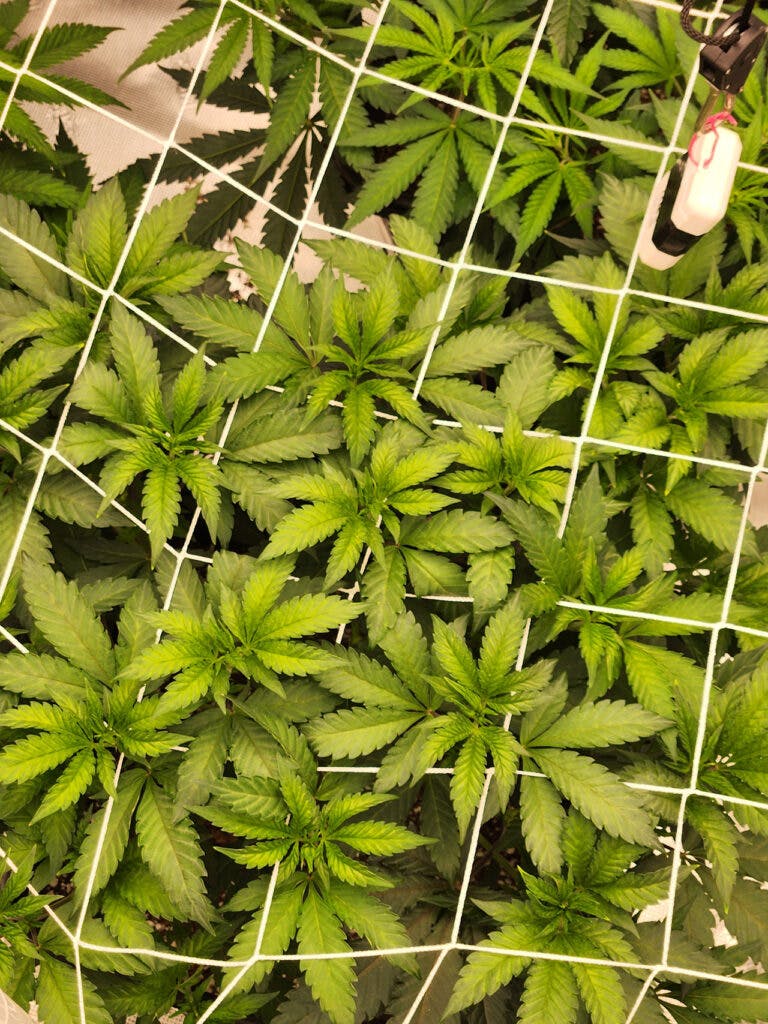
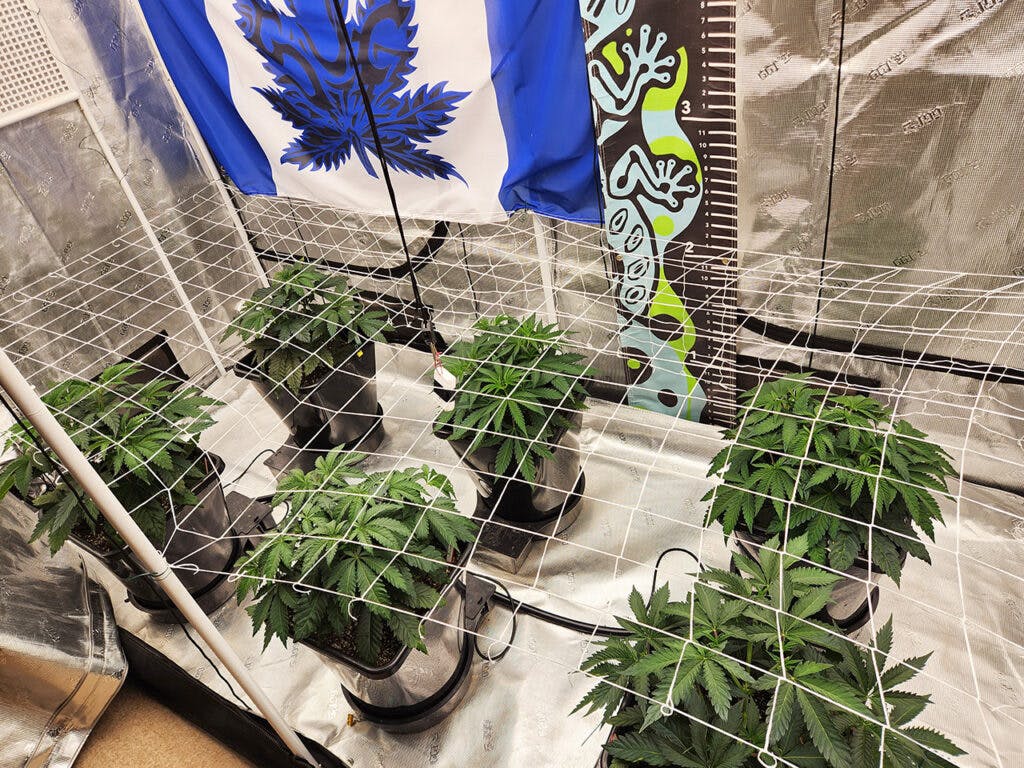
Let’s talk about the method that involved using a scrog net. The term “scrog” means to stretch the cannabis plant growth horizontally instead of your typical vertical growth we are accustomed to outside. An indoor cannabis grower can utilize this method of growing to achieve a near perfect canopy without the use of tie downs or LST clips. The grower secures the scrog net slightly above where they would like their canopy to be unless utilizing two scrog nets at different heights.
Many growers will choose to use a six-inch spacing on the squares for the first layer while switching to a four-inch spacing of squares for their top layer. The idea here is to place the cola where you want them to become ready to be flipped. If done properly, a scrogged tent can be a thing of beauty. My only scuff I have with using a scrog net or two is the hassle come time to chop. Cutting the plant out of the net I find is a real chore, one that I do not enjoy doing often.
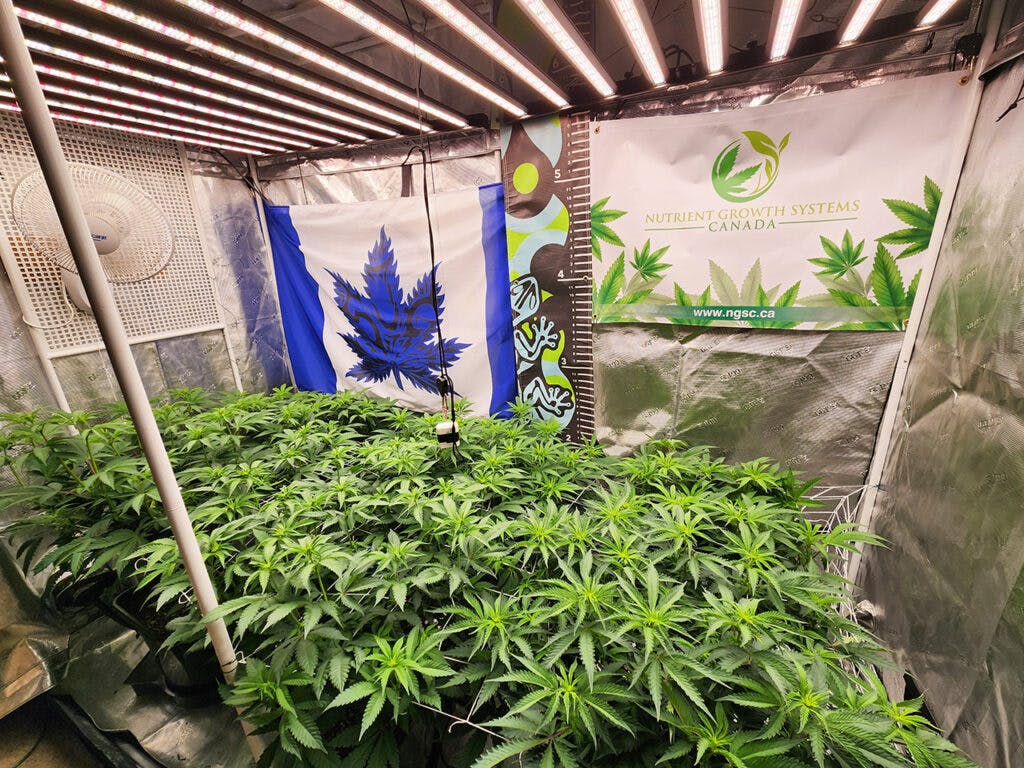
No matter which style you choose for training it is always best to keep in mind what space you have to work with. With that in mind a grower can choose the best method that works for them. That is one of the best parts of growing indoors; it always amazes me to see what growers can achieve in the spaces they have. Many new growers start off in a space as little as 3 x 3 and grow excellent quality flower.
A Note on Weed Nutrients
Now that you have a good idea of how to transplant weed plants, let’s chat a little about nutrients. After all, we will definitely need something to keep the plants thriving. Whether we go with a salt-based nutrient or my preferred organic-based, it is best to make sure we give what is needed and when.
What nutrients do plants need in the vegetative state?
During the vegetative stage of our plants development, it is key to give a healthy feed of nitrogen, potassium and phosphorus. Nitrogen will need to be fed at a higher percentage during this stage, that is where Green Rush Nutrients has dialed it in making it simple. A single feed for this entire stage makes growing for novices a lot less stressful when compared to five or more part mixes.
No matter which style (organic or salt), my good friend over at
has you covered. Use “SLEEPING10” for a 10% discount on your purchase. One major difference between salt based nutrients and organic growing will be the need to flush your growing medium. While using salt based nutrients there will come a time that your growing medium becomes too “hot,” meaning that there is a buildup in your soil that will need to be remedied.Flushing Weed Plants
At this point I would recommend flushing by means of pouring water into your pots until you get around 50% run off of what you poured in. Another great way to measure your run off ppm is to use a ppm meter and you can see exactly where your soil is sitting at. A relatively simple method to avoid build up in our soil is to follow the feed, feed water rule. You simply feed for the first two waters followed by a just water feed on your third watering, and repeat.
You’re On Your Way
There’s a chance that following the steps above, you may find that sometime later, your plant’s root system is under stress or becoming too crowded. In this case, you’ll need to (once again) transplant to larger pots. Every time you transplant, ensure the new pot you’re using is at least twice the size as the previous container.
Congratulations on learning how to transplant weed plants. You are now well into your vegetative cycle of growing cannabis, which can last from weeks to months. Transplanting is a majorly overlooked step in growing weed plants, but if done correctly your next mountain to climb of flowering will be a lot easier! Remember to bend, twist and do what you want to fill your available space with future colas.
Cheers!
Logan Chamut
Canadian Cannafam